You want to know what that blinking check engine light means and how to use an OBD2 scanner to find out. Plug the scanner into the car’s OBD2 port, pull the codes, and look up the trouble code descriptions to learn what systems or sensors need attention. You can get a clear code, a simple description, and a smart next step in minutes using a basic OBD2 tool.
This guide shows how to find the port, connect the scanner, read stored and pending codes, and interpret common code types so you know whether to fix it yourself or seek a mechanic. It also points out common mistakes to avoid and useful features that save time.
Key Takeaways
- Learn where to plug in and how to pull codes quickly.
- Use code descriptions to decide if a DIY fix or shop visit is needed.
- Avoid common scanning errors and use extra features when helpful.
Understanding OBD2 Systems
OBD2 links the car’s computer to a scanner and stores codes when sensors or systems detect faults. Knowing what the scanner is, how codes appear, and the main code types helps a reader diagnose and prioritize repairs.
What Is an OBD2 Scanner?
An OBD2 scanner is a handheld or app-based tool that reads data from a vehicle’s engine control unit (ECU).
It connects to the car through the standard 16-pin DLC (Data Link Connector), usually under the dash.
Scanners show stored Diagnostic Trouble Codes (DTCs), live sensor data (RPM, coolant temperature, fuel trims), and readiness monitors used for emissions testing.
Basic code readers only display codes and clear the check engine light. Advanced scanners log live data, run component tests, and show freeze-frame snapshots.
Buy a scanner that matches the vehicle and needs: simple code reader for DIYers, mid-range for informed troubleshooting, or professional-level for shops.
Check for features like ABS/SRS coverage, live graphing, and manufacturer-specific code support before buying.
How OBD2 Codes Are Generated
The vehicle’s ECU monitors sensors and system outputs continuously while driving.
When a sensor value goes outside a defined threshold or a self-test fails, the ECU records a DTC and often turns on the Malfunction Indicator Lamp (MIL), aka check engine light.
Each stored event may include a freeze-frame: a short snapshot of sensor values at the fault time.
This helps link a code to specific conditions like engine load, speed, or temperature.
Some faults are intermittent. The ECU can log a pending code first, then confirm it if the fault repeats.
Clearing codes without fixing the root cause only removes the record temporarily; the ECU will set the code again if the issue remains.
Types of OBD2 Codes
OBD2 codes use a five-character format like P0301. The first character is a letter: P (powertrain), C (chassis), B (body), or U (network).
The second character shows whether the code is SAE/Generic (0) or manufacturer-specific (1).
The third character defines the subsystem: for P-codes, 0 = fuel/air metering, 1 = injector, 2 = ignition, 3 = emissions, etc.
The last two digits identify the specific fault within that subsystem.
Common groups to watch:
- Misfire codes (P0300–P0308) point to ignition, fuel, or compression issues.
- O2 sensor and catalytic converter codes (P0130–P0167, P0420) relate to emissions control.
- Sensor circuit faults (P01xx, P02xx) often mean wiring or sensor failure.
Use the code as a starting point, not a final diagnosis.
Combine the code with live data, freeze-frame info, and basic checks like wiring, connectors, and vacuum leaks to find the true cause.
Key Steps Before Code Retrieval
Check the vehicle is in a safe state, grab the right scanner and cables, and know where the OBD2 connector sits. Confirm battery charge, ignition position, and any app or device pairing before plugging in.
Preparing Your Vehicle
They should park on level ground and set the parking brake to prevent movement while working. The engine can be either off or in the “ON” position depending on the scanner instructions; many basic scans require ignition ON without starting the engine. If live data or readiness tests are needed, the engine may need to run—consult the scanner guide.
They must ensure the battery has enough charge. A low battery can cause communication errors or dropouts. Turn off accessories like the radio and climate control to reduce electrical load when connecting the scanner.
Have the vehicle’s key, owner’s manual, and any required app or login ready. For Bluetooth or Wi‑Fi adapters, install the app and pair the device before connecting to the car. Write down the vehicle VIN and current mileage if the scanner or app asks.
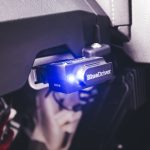
Locating the OBD2 Port
They will typically find the 16‑pin OBD2 connector under the driver‑side dashboard near the steering column. Check under the dash, inside a small access panel, or near the fuse box. Use a flashlight and feel around the area if visibility is poor.
Some models place the port slightly left or right of the steering column, or behind a trim panel. If the connector isn’t visible, check the driver’s footwell, center console lower panel, or consult the owner’s manual for the exact location. Online resources and dealer service sites can also list port locations by make and model.
Before plugging in the scanner, inspect the port for debris, bent pins, or corrosion. A damaged connector can cause poor contact and faulty readings. Clean gently with compressed air if needed and align the scanner plug carefully to avoid bending pins.
Essential Safety Precautions
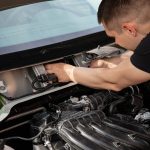
They should avoid working on a hot engine or near moving parts. If the engine needs to run for tests, keep hands, jewelry, and loose clothing away from belts, fans, and pulleys. Work in a well‑ventilated area to prevent exhaust buildup if the engine runs.
Disconnect any aftermarket electronics that might interfere with the scan, like alarm systems or battery tenders. If the vehicle has a hybrid or high‑voltage system, follow manufacturer safety steps and consider professional help—these systems carry serious shock risk.
Use the correct scanner and cables rated for automotive use. Do not force connectors. If the scanner requires a specific ignition state, follow that exactly to avoid setting unintended codes or damaging vehicle modules.
Connecting and Operating Your Scanner
This section explains how to power the scanner, use its menu, and fix common connection problems. It focuses on exact steps, button names, and where to look when things go wrong.
Powering On and Interface Basics
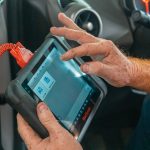
Plug the scanner into the vehicle’s OBD-II port, usually under the dash near the steering column. Most scanners power on automatically when the port supplies 12V; handheld units may need a power button press. If it uses a Bluetooth or Wi‑Fi adapter, plug the adapter into the port and turn the car key to the ON position without starting the engine to power the module.
On-screen basics: look for a home/menu screen, a “Read Codes” or “DTC” option, “Live Data,” and “Erase Codes.” Buttons commonly include arrows, Enter/OK, Back, and a dedicated Power key. If the device has a touchscreen, tap icons; if not, use arrows to highlight and Enter to select. Note any battery icon, connection status, or adapter name shown.
Navigating the Scanner Menu
Start by selecting the vehicle make or using “Auto Detect” if available; that ensures correct protocol (CAN, KWP, ISO). Choose “Read Codes” to get stored and pending DTCs. Record the exact code (example: P0302) and any short text description the tool provides.
Use “Live Data” to view sensor readings like RPM, coolant temp, and O2 voltage. Freeze frame gives sensor values at the moment a fault set. To clear codes, pick “Erase/Clear Codes” only after fixing the issue or to confirm if a fault returns; clearing will turn off the Check Engine light but does not fix the fault. Save or photograph screens with long-press or built-in save if the scanner supports logging.
Common Connection Issues
If the scanner shows “No Communication” or blank screens, first check the OBD-II port for debris or damage. Wiggle the connector while powered off, then reinsert firmly with the ignition ON. Try a different vehicle to rule out scanner fault.
For wireless adapters, ensure the phone or tablet pairs to the adapter’s Bluetooth/Wi‑Fi network. Restart the adapter and the app if pairing fails. Check vehicle fuse for the OBD power circuit if the scanner never powers up. Finally, consult the scanner’s supported protocol list; older scanners may not support newer CAN-based vehicles, causing no response.
Decoding and Interpreting Codes
This section explains how OBD2 codes are built, which codes are universal or maker-specific, and how to look up exact meanings. It shows what each character means, where manufacturer details matter, and trusted places to find code definitions.
Understanding Code Structure
An OBD2 trouble code has five characters: a letter and four digits (for example, P0302).
The first character is the system: P = Powertrain, C = Chassis, B = Body, U = Network. This tells which part of the car the code targets.
The second character shows if the code is generic or manufacturer-specific: 0 = generic, 1 = manufacturer-specific.
Digits three through five give the fault category and specific failure. For example, in P0302 the “03” group means ignition/misfire and the final “2” means cylinder two.
Knowing this structure helps narrow diagnostics quickly. Technicians use the letters to pick which manual or subsystem to test first. It also helps avoid guessing when the code points to a specific component or circuit.
Generic vs Manufacturer-Specific Codes
Generic (SAE) codes use the 0 as the second digit and apply to all OBD2 vehicles.
These codes describe common faults like misfires, oxygen sensor failures, or catalytic converter efficiency. A P0420, for example, is a generic catalytic efficiency code.
Manufacturer-specific codes use 1 as the second digit.
They can reference parts or behaviors unique to a brand, like a transmission control strategy or an evaporative system valve used only by that automaker. Reading a manufacturer-specific code without the maker’s service data can lead to wrong repairs.
When a scanner shows both a generic and a manufacturer code, technicians prioritize the manufacturer code for model-specific fixes. If unsure, they check both definitions before replacing parts.
Accessing Code Definitions
Start with the scanner’s built-in code list if it provides one. Many entry-level scanners show only the code and a short description like “O2 Sensor Circuit.”
Next, consult an online OEM service manual or a trusted database (official dealer info, AllData, Mitchell1). These sources give wiring diagrams, freeze-frame data, and troubleshooting steps tied to the exact code.
Use a reputable app or website that lets users enter the 5-character code and the vehicle VIN or model year.
Cross-check any repair steps with TSBs (Technical Service Bulletins) and recall information. This prevents replacing parts that are known to fail due to software or calibration issues.
Advanced Features and Troubleshooting
This section shows how to use live sensor readings, examine the snapshot data captured when a fault occurred, and safely clear stored trouble codes. It focuses on steps, key values, and risks the reader must watch for.
Live Data Review
Live data displays real-time sensor values while the engine runs. The reader should connect the scanner, select the PID list, and watch items like RPM, MAF (g/s), O2 voltage (V), and coolant temp (°C/°F). Compare readings to normal ranges for the vehicle; choppy or out-of-range values point to faulty sensors, wiring, or vacuum leaks.
Use a table to track suspect parameters:
| Parameter | Normal example | What abnormal means |
|---|---|---|
| RPM | 700–900 idle | Misfire, vacuum leak, idle control fault |
| MAF | 2–7 g/s idle | Dirty sensor or intake leak |
| O2 sensor | 0.1–0.9 V cycling | Rich/lean condition or bad sensor |
| Coolant temp | ~85–100 °C | Thermostat or sensor issue |
Log values while revving and during steady cruise. Note response lag and sensor correlation (e.g., MAF increases with RPM). If one sensor reads implausible values, confirm with a second tool or swap with known-good sensor before replacing parts.
Freeze Frame Information
Freeze frame captures engine state at fault moment. The reader must view freeze frame to see variables that existed when a DTC set. Important fields include engine load, RPM, throttle position, fuel trim, and ambient temp.
Check freeze frame against live data and test-drive conditions. If freeze frame shows high load and high temp, the fault may be heat-related. If it shows low speed and closed throttle, the issue may be idle control or wiring. Use this checklist:
- Note timestamp and DTC code.
- Record the freeze frame values into a table.
- Recreate conditions (if safe) on a test run to verify repeatability.
Freeze frame helps avoid replacing parts that only fail under specific conditions. If freeze frame is empty for intermittent faults, enable extended logging and re-test.
Clearing Stored Codes
Clearing codes should follow diagnosis, not before. The reader can use the scanner’s “Erase” or “Clear DTCs” command after repairs. Clearing codes will reset readiness monitors and erase freeze frame data.
Follow this safe procedure:
- Repair or confirm suspected cause.
- Record all DTCs and freeze frame data.
- Clear codes with ignition on, engine off (per tool instructions).
- Drive the vehicle through a full readiness cycle (mix of city/highway) to let monitors run.
Be aware: clearing codes without fixing the fault may only hide the problem temporarily. After clearing, if codes return, use live data and freeze frame to narrow down causes.
Next Steps After Code Identification
After reading codes, the reader should judge how urgent the problem is, decide whether to fix it now or later, and know when to hire a mechanic. The next actions depend on the exact code, any freeze-frame data, and vehicle symptoms.
Evaluating the Severity of Issues
They should first check whether the code is causing drivability problems. If the engine runs rough, stalls, or a warning light flashes, treat it as urgent. A flashing check-engine light often means a misfire that can damage the catalytic converter; stop driving and tow if needed.
For steady lights with no performance loss, they can drive carefully to a shop. Use freeze-frame data and live sensor readings to see if the issue is intermittent. Research the specific DTC (for example, P0302 = cylinder 2 misfire) to learn common causes and whether it is emission-related or safety-related.
Also note if multiple codes appear. Multiple related codes can point to one root cause, like a vacuum leak or failed sensor. Prioritize repairs that prevent further damage or failed emissions tests.
Planning Repairs or Maintenance
They should start by matching the code to the most likely parts and tests. Create a short checklist: inspect wiring and connectors, test sensors with a multimeter, check vacuum lines, and inspect ignition components or fuel delivery where relevant. For example, for oxygen sensor codes, check sensor wiring and measure voltage response before replacing the sensor.
Estimate parts cost and time. Cheap parts like spark plugs or a mass airflow sensor are often worth replacing first if tests point there. For complex jobs, gather repair manuals or step-by-step guides specific to the vehicle’s year and engine.
If they plan DIY, gather tools, safety gear, and a torque spec chart. Keep a record of cleared codes and retest after repairs to confirm the fix. If the same code returns, escalate testing rather than replacing more parts.
When to Seek Professional Help
They should hire a pro for codes tied to transmission, ABS, airbags, or when the fault causes safety risks. Complex diagnostic steps like pressure tests, waveform analysis, or ECU programming require shop-grade tools and experience.
If troubleshooting steps don’t isolate the cause after basic checks, a technician can use advanced scans, smoke tests, and component-level diagnostics. Also consult a shop when multiple unrelated codes appear or when repairs need special tools such as fuel system calibration rigs.
Finally, use a mechanic when time or warranty matters. Dealers or certified shops will document repairs for emissions compliance and may cover software updates or recalls linked to the DTC.
Best Practices for Effective Use
They should always read the vehicle’s manual or a trusted diagram to find the OBD2 port before connecting a scanner. This avoids guessing and makes the process faster.
They should turn the ignition to the “on” position before starting the scan. Many scanners need power and a stable data link to pull codes properly.
They should record codes and freeze-frame data exactly as shown. A photo or written note helps when looking up meanings or showing a mechanic.
They should clear codes only after a confirmed repair or test. Clearing without fixing can hide ongoing problems and waste time.
They should check both active and pending codes, plus live data if the scanner supports it. Live data helps confirm symptoms like misfires, high fuel trim, or oxygen sensor issues.
They should use reputable code lookup resources and the vehicle’s service manual for accurate diagnostic steps. Generic code definitions can mislead; manufacturer-specific details matter.
They should follow safety rules: park on level ground, engage the parking brake, and avoid hot engine parts when inspecting sensors. Safety reduces injury risk and protects the vehicle.
Useful quick checklist (bold items are critical):
- Locate OBD2 port and power scanner
- Record codes and freeze-frame data
- Verify live data where possible
- Research manufacturer-specific info
- Clear codes only after repair
- Follow basic safety steps
They should update scanner firmware when available. Newer updates add codes and improve compatibility.
Common Mistakes to Avoid
Many people treat a code as a direct parts list. A code points to a system or sensor, not always the failed part. They should test components and wiring before replacing anything.
Clearing codes too soon hides the root cause. If a code returns, diagnostics become harder and intermittent faults stay unresolved. Let the issue run through a drive cycle after repairs.
Relying only on generic code definitions misleads diagnosis. Vehicle-specific service information and freeze-frame data usually matter. They give context like engine load, temperature, and RPM when the fault occurred.
Ignoring pending or manufacturer-specific codes costs time. Pending codes can show early faults. Manufacturer codes (P1xxx, B1xxx, etc.) may need dealer-level references to interpret correctly.
Skipping visual and basic checks wastes scanner data. Simple inspections of hoses, connectors, and grounds often find the problem first. Electrical tests and smoke tests can confirm leaks or shorts.
Using a cheap scanner without enough features causes wrong conclusions. Not all scanners read live data, freeze-frame, or manufacturer codes. Choosing the right tool for the car saves diagnostic time.
Overlooking stored data trends leads to repeated fixes. They must review live data and note patterns over several drive cycles. Professional-grade logs or freeze-frame screenshots help track intermittent issues.
FAQs
| Question | Answer |
|---|---|
| What does a code like P0301 mean? | It shows a specific problem. P0301 means a misfire in cylinder 1. The code points to the area to check first. |
| Can the scanner tell the exact part to replace? | No. A code narrows the fault but does not always name the failed part. Technicians use the code plus tests to find the real cause. |
| Are pending and stored codes different? | Yes. Pending codes show recent issues that need confirmation. Stored codes are confirmed faults saved by the car. |
| Will clearing codes fix the problem? | Clearing only removes the code from memory. If the underlying fault remains, the code will return and the light will come back on. |
| Do all cars use the same OBD2 codes? | Most gasoline cars use standard P0xxx codes. Some manufacturers add extra codes or variations for specific systems. |
| Is an expensive scanner necessary? | No. Basic scanners read and clear codes and show live data. Advanced scanners add features like graphing and bidirectional tests. |
Common tips: read freeze-frame data and live sensor values. They help confirm the issue quickly. Always record the code and conditions before clearing.
If the user is unsure, a professional diagnosis can prevent wasted time and parts.
Conclusion
Learning to read OBD2 scanner codes gives drivers a clear way to find car problems fast. It helps them decide if a simple fix is possible or if a mechanic is needed.
They can use the scanner to read DTCs, note code types (P, C, B, U), and check live data for context. Combining codes with basic tests often points to the likely causes without guesswork.
Using reliable resources and repair manuals improves accuracy. They should compare codes to trusted sources and follow safety steps when inspecting the vehicle.
When a code points to a complex system, professional diagnosis may save time and money. Clearing codes before a confirmed repair can hide recurring issues, so they should avoid clearing codes as the first step.
Quick reference:
- Always record codes and freeze-frame data.
- Check live data and emissions readiness.
- Research specific codes for the vehicle make and model.
With practice, reading OBD2 codes becomes a useful troubleshooting skill. It gives drivers more control and a better sense of next steps for repairs.