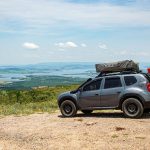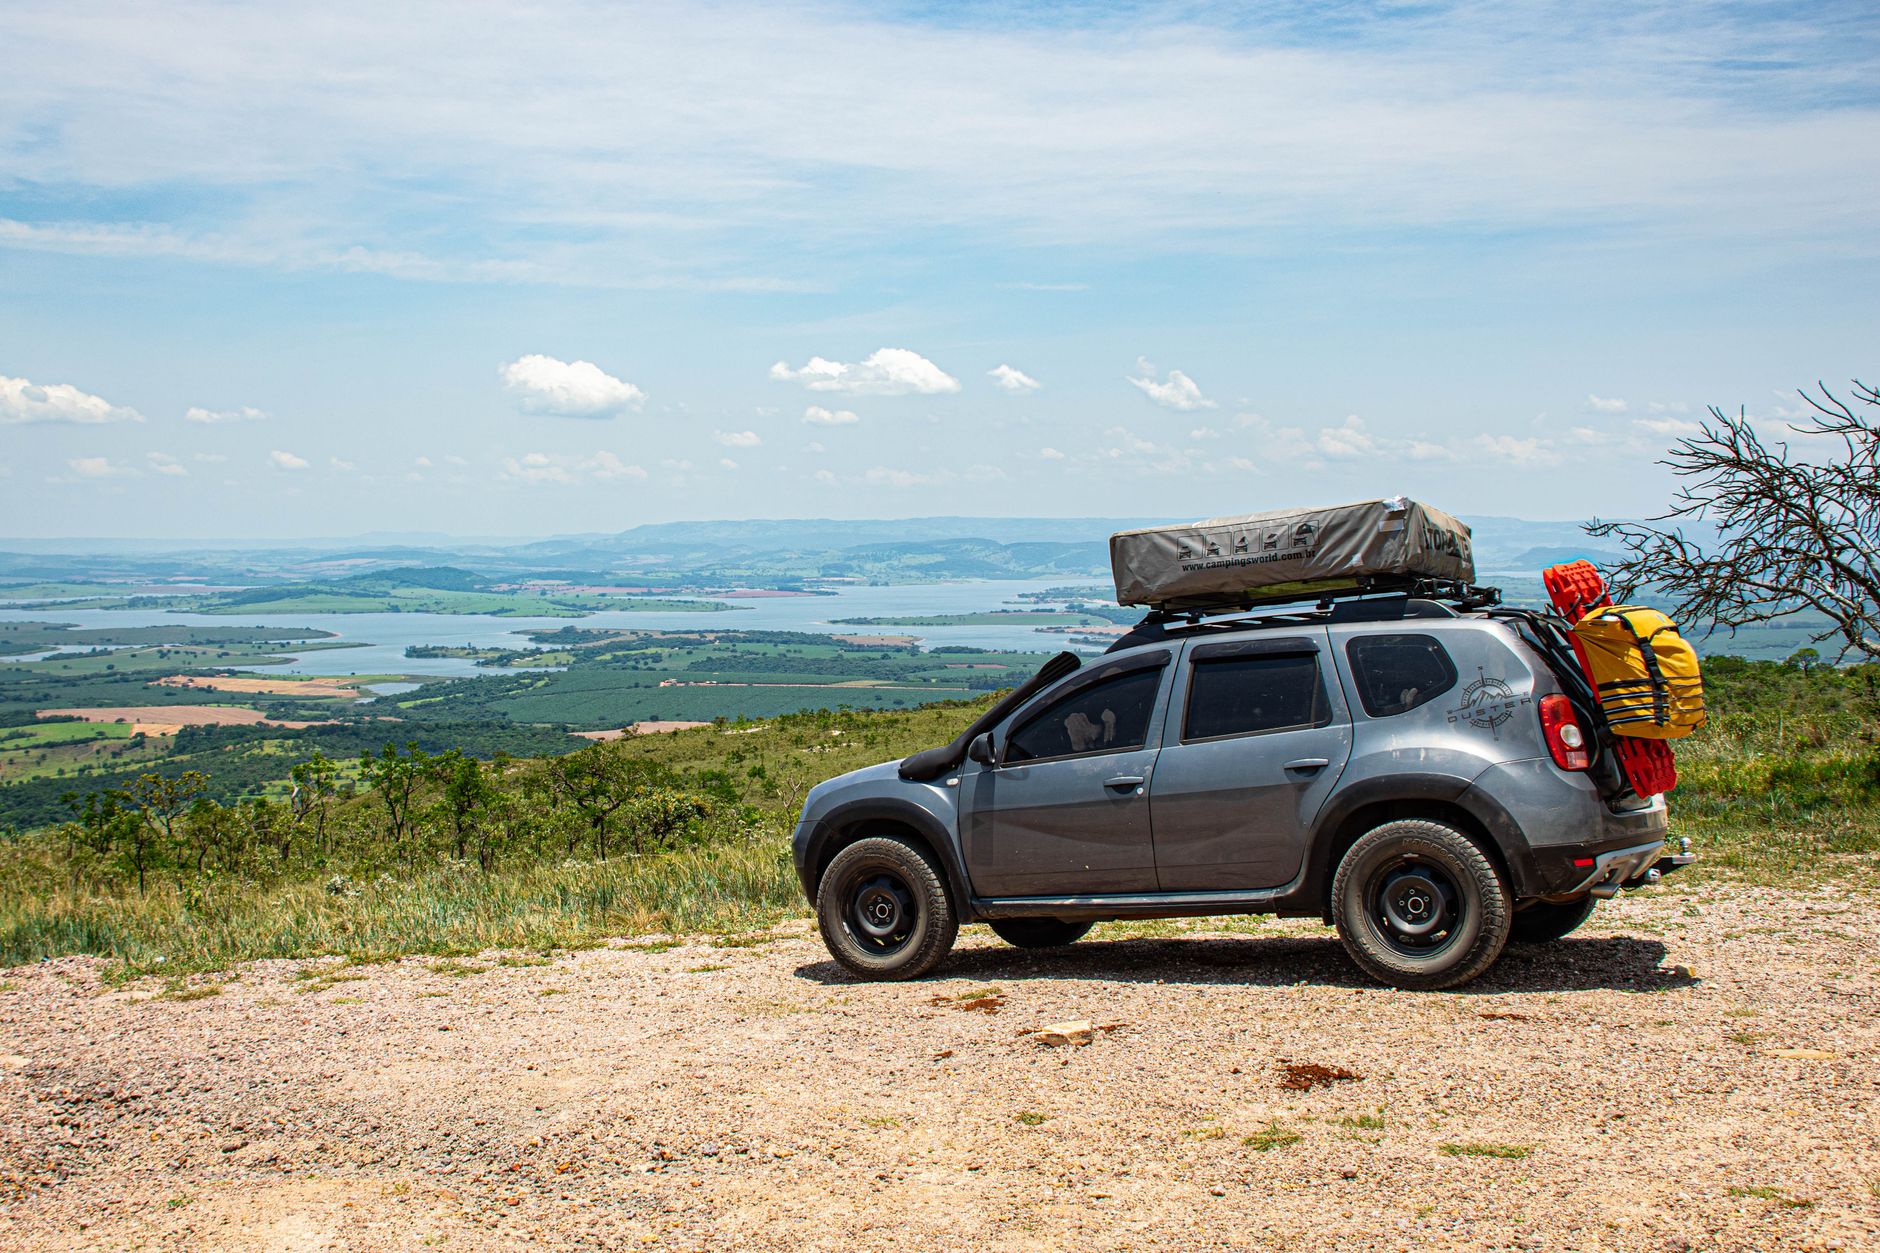
You want extra storage for road trips without buying an expensive cargo box. Making a roof bag lets you use tough, waterproof fabric and simple straps to build a secure, low-cost carrier that fits your car and gear. You can make a durable, weatherproof roof bag with basic materials, a few tools, and clear measurements to match your roof and load.
This guide shows step-by-step choices for materials, a straightforward build plan, and tips to fasten the bag so it stays put while you drive. It also covers packing habits, maintenance, and safety checks so the bag lasts and you avoid fines or damage.
Key Takeaways
- Choose durable, weatherproof fabric and strong fasteners for a reliable roof bag.
- Follow clear measurements and a simple construction plan to fit the vehicle securely.
- Pack and maintain the bag correctly to protect gear and stay safe on the road.
Benefits of DIY Roof Bags
DIY roof bags let someone save money, pick specific sizes and pockets, and choose the exact fabrics and seams needed for their trips. They can control weight limits, weather resistance, and how the bag fits the car.
Cost Savings Compared to Store-Bought Options
Building a roof bag often costs less than buying a premium model. Basic materials—heavy-duty PVC tarp, waterproof zippers, nylon webbing, and stainless buckles—can be bought for a fraction of a name-brand soft box price. If someone already owns tools like a sewing machine and heat gun, material-only costs drop further.
DIY also reduces long-term costs. Repairing a seam or replacing a zipper is cheaper than replacing an entire unit. And the builder can reuse materials from old gear, lowering outlay. For budget-conscious travelers, that means more trips for the same money.
Customization Possibilities
A DIY bag lets the maker tailor capacity, shape, and attachment points to one vehicle. They can size a bag to fit between roof rails or to sit above a sunroof without blocking it. Internal dividers, molded foam pads, and dedicated straps for fragile gear can be added.
Exterior features can match specific needs too: extra lash points for kayaks, reflectors for night visibility, or a drain valve for wet gear. The builder can also select colors and patterns to reduce heat absorption or improve visibility. These choices improve fit, safety, and function.
Material Quality Control
When someone builds their own bag, they pick each component to meet a clear spec. They can choose ripstop nylon with a 1000D rating, seam-taped waterproofing, and marine-grade stainless hardware. That level of control helps create a bag rated to withstand road salt, UV, and heavy rain.
Testing and inspection happen during construction. The maker can double-stitch stress points, add backing plates under buckles, and run a water test before use. That hands-on process reduces surprises and ensures the finished bag matches the user’s durability expectations.
Choosing Suitable Materials
The materials must keep gear dry, resist tears, and hold up to straps and roof motion. Pick fabrics and parts that match the intended load, climate, and how often the bag will be used.
Weatherproof Fabrics
Choose synthetic weaves with a high denier rating, such as 600D or higher polyester or nylon. These fabrics balance weight and abrasion resistance. Look for PVC coating or TPU lamination to add waterproofing; a 600D polyester with PVC coating resists rain and light spray while staying affordable.
Check seam sealing: fully taped seams prevent water entry where panels join. If seams are not taped, plan to apply seam tape or use a welded construction method. For long trips in heavy rain, pick fabric with a welded or heat-sealed seam system rather than stitched seams alone.
Also consider UV resistance. Fabrics with UV stabilizers or a UV-protective topcoat will last longer under sun exposure. Test a small swatch for flexibility in cold weather—some coatings stiffen in low temperatures.
Heavy-Duty Zippers and Closures
Use marine-grade zippers or waterproof slider systems designed for outdoor gear. Look for zippers labeled “water-resistant” or with a PU-coated zipper tape. A high-quality #10 or #8 molded zipper resists bending and corrosion better than smaller sizes.
Design closures with redundancy: a heavy zipper plus a roll-top flap or storm flap over the zipper reduces direct water flow. Add buckles and webbing rated for at least 200–300 kg breaking strength to secure the bag to crossbars and compress contents.
For long-term use, choose stainless steel or brass slider components, and use zipper lubricant periodically. Consider adding drain grommets with plugs to let trapped water escape while preventing debris entry.
Reinforcement Techniques
Reinforce load-bearing points with double-stitched bartacks and interfacing patches of abrasion-resistant fabric, like ballistic nylon, at the corners and strap attachment areas. Sew a rectangular patch with an X-stitch where each strap meets the bag to spread load across more fabric.
Use internal or external webbing channels to route straps and reduce stress on the shell. When adding a base panel, glue and stitch a PVC or rubberized sheet to create a wear-resistant floor. Bonding with marine adhesive plus mechanical stitching prevents delamination under wet conditions.
Finally, where possible, fuse layers with heat-welded seams for higher strength. If stitching must be used, back seams with seam tape and apply a waterproof seam sealer to protect thread holes.
Key Design Considerations
Choose shapes and features that cut wind, match roof size, and keep cargo secure. Focus on materials, seam strength, and attachment points that meet weight limits and resist weather.
Aerodynamic Shapes
They should reduce drag and lift to save fuel and keep stability. A low, tapered profile with a rounded front and gradual rear taper works best. Aim for a height no more than 10–12 inches above the roof for most cars to limit wind noise and buffet.
Use curved panels rather than sharp edges. Center the bag on the roof so airflow splits cleanly over the sides. Reinforce the leading edge with stiffer material to hold shape at highway speeds.
If designing for high speeds or long trips, test with small models or in a safe, controlled environment. Measure noise and vibration at 60–75 mph and adjust curvature or add fairings to smooth flow.
Size and Capacity Needs
Start by measuring roof length and width clear of antennas and sunroofs. Decide on usable volume in liters or cubic feet; common DIY bags range 200–500 liters for family trips. Keep weight within the vehicle roof load limit—check the owner’s manual for a numeric value (often 75–200 kg).
Design compartments or internal straps to keep heavy items low and centered. Use a flat base to sit evenly on crossbars or roof rails. Consider compression straps or internal dividers to reduce shifting and lower the center of gravity.
Provide clear labeling of maximum fill weight and dimensions on the bag. Make the bag slightly smaller than the full roof area so it won’t overhang and risk snagging on obstacles.
Safety Features
Use durable, weatherproof fabric like PVC-coated polyester and triple-stitched seams to prevent splits. Add welded or taped seams at critical points to stop leaks. Include at least four attachment points and check strap load ratings; choose ratchet or cam straps with metal buckles rated above expected loads.
Design built-in anchor sleeves or loop straps that thread under doors or over crossbars to avoid relying solely on roof rails. Add reflective strips and an emergency access zipper so occupants can reach items without removing the bag.
Include a pressure-release flap or breather valve to prevent suction-related stress on seams. Provide simple inspection points and instructions for regular checks of straps, seams, and fasteners before each trip.
Preparing Essential Tools and Supplies
Gather accurate measuring tools, reliable cutting gear, and a sewing setup that fits the chosen fabric and budget. Focus on precision for fit, strong cuts for clean edges, and a sewing method that gives waterproof, durable seams.
Measuring Equipment
They need a flexible tape measure for curved surfaces and a rigid yardstick for straight edges. Use a tape that reads both inches and centimeters to avoid conversion errors when cutting panels. Mark reference points on the car roof with masking tape to record original measurements. Measure length, width, and height at multiple spots—front, middle, rear, and over roof rails—so the bag follows the roof shape.
Buy a small folding rule or metal straightedge to check seam allowances and ensure panels line up during layout. A fabric chalk or washable marker helps mark cut lines clearly. Keep a notebook to record each panel’s final dimensions and seam allowance used.
Cutting Instruments
They should choose a sharp pair of heavy-duty shears made for thick fabrics like vinyl or marine canvas. Replaceable-blade utility knives work well for straight-line cuts on layered materials; use a metal ruler as a cutting guide. Rotary cutters give clean curves on single layers but require a durable cutting mat to protect surfaces.
Include extra blades, a small file for blade care, and cut-resistant gloves to protect hands when forcing cuts through thick seams. Clip-style snips help trim webbing, zipper tape, and small threads. Store blades in a labeled box to avoid dulling from mixed-use metal tools.
Sewing Machines and Alternatives
A heavy-duty, compound-feed or walking-foot machine handles vinyl, PVC, and thick webbing best. Look for a machine rated for upholstery or canvas with a minimum 1,000 stitches per minute and a large throat space for bulky panels. Use leather or heavy-gauge needles (size 100/16 or larger) and bonded nylon or polyester thread for strength and weather resistance.
If a heavy machine is not available, consider a hand-sewn option using sailmaker’s needles and waxed polyester thread for strong, waterproof seams. Another alternative is using industrial rivets or bar tacks at high-stress points combined with seam tape and waterproof adhesive. Test stitch patterns and thread tension on scrap material before sewing main panels.
Step-by-Step Construction Process
This section gives clear, concrete steps for cutting panels, sealing seams, attaching straps, and adding waterproof coatings. Each part lists tools, measurements, and key checks to help make a safe, usable roof bag.
Cutting and Assembling Panels
They should start by selecting 600D polyester or heavy-duty PVC fabric and a matching foam backing for shape. Measure the roof area and add 4–6 inches to length and width for seams and mounting overlap. Create a simple pattern: two identical side panels, one top panel, and a bottom panel if making a shaped bag. Mark seam allowances of 1 inch on all pattern pieces.
Cut with sharp shears or a rotary cutter on a flat surface. Use straightedge and fabric chalk for precise lines. When assembling, align panels with right sides together and pin or clip every 2–3 inches. Leave an access gap to turn the bag right-side out and for inserting the zipper or closure.
Securing Seams and Joints
They should use a heavy-duty sewing machine or a hand-stitch technique with polyester thread rated for outdoor gear. Double-stitch load-bearing seams with a 0.5-inch stitch length and reinforce with bar tacks at stress points like corners and tie-downs.
Options for extra strength:
- Sew seams, then apply seam tape on the inside.
- Use a zigzag stitch over raw edges to reduce fraying.
- Add a fabric strip (1–2 inches) as a reinforcement backing across long seams.
Test seam strength by applying firm hand pressure and a small weight at stress points. If any seam pulls, resew with a wider seam allowance or add a reinforcement patch.
Adding Straps and Fasteners
They should attach four main mounting straps and two safety straps. Use 1.5–2 inch nylon webbing rated for load; sew webbing ends through a folded-back seam and box-stitch with an X pattern for strength. Place straps near the bag corners and one pair centrally along the length if the bag is long.
Include quick-release buckles and adjustable tri-glide sliders for tension control. Add D-rings or metal cam buckles for extra security. Sew on attachment points twice: once through the bag fabric and once through an internal backing plate (plastic or leather) to spread load and prevent pull-through.
Label strap lengths and test fit on the roof rack before final stitching. Ensure buckles face outward and strap ends are heat-sealed to prevent fraying.
Applying Waterproof Treatments
They should seam-seal stitched areas with a urethane or silicone-based seam sealer suitable for the chosen fabric. Apply with a small brush, pressing sealer into needle holes, and allow full cure time per product instructions.
For surface waterproofing, use a spray-on or brush-on coating made for polyester or PVC. Apply two thin coats rather than one thick coat and dry between coats. For zipper areas, install a waterproof zipper or add an external flap with hook-and-loop or snaps to keep water out.
Perform a water test by spraying the bag and checking interior for leaks. Reapply sealer to any wet spots and reinforce high-wear zones with an additional outer coat.
Ensuring a Secure Fit on the Vehicle
A secure roof bag needs the right size, solid attachment points, and protection for the car’s finish. Measure carefully, use proper straps and attachments, and add barriers where the bag touches paint.
Measuring for Universal vs. Custom Fit
They should measure roof width, usable roof length, and crossbar spacing before choosing a bag. For universal bags, check the bag’s maximum width and length against the vehicle’s roof dimensions so the bag does not overhang windows or doors. Note load limits stamped in the owner’s manual and the roof rack’s weight capacity; do not exceed either.
For a custom-fit bag, order dimensions to match the exact roof contours and crossbar positions. Account for antenna, roof rails, and sunroof clearance. Verify height so the bag won’t hit a garage door. Mark mounting points on the bag base to line up with crossbars to ensure even load distribution.
Attaching Straps to Roof Racks
They should use rated buckle straps or cam straps designed for roof cargo, not generic rope or bungee cords. Run main straps under each crossbar and back up over the bag; use a crisscross pattern for lateral stability. Tighten straps enough to remove slack but avoid over-tension that could cut into the bag material or bend rack hardware.
Use secondary anti-flutter straps front-to-rear to stop wind lift at highway speeds. Secure loose strap ends with clips or tape to prevent flapping. If the vehicle has side rails only, loop straps around the rails and use rubber sleeves to keep straps from sliding. Recheck strap tension after the first 10 miles and at stops.
Protecting Car Paint and Finish
They should place a protective barrier between the bag and paint where straps or bag edges contact the roof. Options include foam pads, rubber strips, or cloth wraps around straps to prevent abrasion. Use non-abrasive materials and replace them if they show wear.
Avoid direct strap contact with painted metal by routing straps over crossbars or through dedicated rack attachment points. Clean the roof and rack contact areas before mounting to remove grit that can scratch. Inspect paint after long trips and treat chips promptly to prevent rust.
Best Practices for Loading and Packing
Keep loads within the roof and vehicle limits, place heavy items low and centered, and secure everything so it cannot shift. Follow specific weight, space, and tie-down steps to avoid damage to the bag, rack, or car.
Weight Distribution Tips
They should check the vehicle roof load limit in the owner’s manual before packing. Most cars allow around 110–165 lbs (50–75 kg), but the exact number matters more than estimates.
Place the heaviest items near the center of the roof bag, over the vehicle’s roof crossbars if present. This lowers the center of gravity and reduces stress on the front or rear of the rack. Keep about 60–70% of total roof weight toward the rear half of the bag for better balance in turns and braking.
Distribute weight evenly side-to-side to prevent leaning. If carrying several heavy items, split them into matched pairs and place them symmetrically. Record total roof weight and add it to vehicle cargo weight to stay under vehicle limits.
Maximizing Space Efficiently
Start with soft-sided items like clothes, sleeping bags, or jackets; they compress and fill gaps well. Use packing cubes or heavy-duty compression sacks for sleeping bags and clothing to free space for rigid items.
Place flat, rigid items (skis, tent poles, folding tables) along the length of the bag, close to the roof, to avoid bulging. Stack medium-weight gear in the middle and lighter items on top and toward the front to reduce drag and wind noise.
Use a simple checklist to pack in layers: 1) heavy and rigid, 2) medium and soft, 3) light and fragile. Leave a small air gap under the outer cover to prevent over-compression that can burst seams or zipper tracks.
Preventing Item Movement
They must use internal straps or tie-downs inside the bag to keep items from sliding. If the bag lacks internal anchors, place items in smaller sacks and clip those together with carabiners or strap loops.
Wrap fragile gear in clothing or bubble wrap and place it in the bag’s center. Use non-slip shelf liners or closed-cell foam pads under heavy items to increase friction against the roof or rack.
Externally secure the bag to the crossbars using rated straps and check all buckles twice. Re-check straps after 30 miles and at regular stops. Inspect for shifting, loose straps, or exposed zipper teeth and retighten as needed.
Maintenance and Long-Term Care
Keep the roof bag dry, clean, and stored flat or rolled loosely to prevent creases. Inspect straps, seams, and zippers before and after trips so small problems are fixed early.
Cleaning Techniques
They should rinse off salt, mud, and road grime with a hose after each trip. Use cool or lukewarm water and a soft brush or sponge to avoid scratching the fabric. For stubborn dirt, mix a mild soap (pH-neutral car or fabric soap) with water and scrub gently.
Avoid bleach, strong detergents, and high-pressure washers; these can strip waterproof coatings and damage seams. Rinse thoroughly until no soap residue remains. Let the bag air dry completely in shade — direct sun for long periods can weaken fabric and fade coatings.
For zippers and buckles, use a soft brush to remove grit. Apply a small amount of silicone spray or zipper lubricant to keep parts moving smoothly. Do not oil straps or sewn areas.
Proper Storage Methods
They should store the roof bag clean and fully dry to prevent mold and mildew. Fold it loosely or roll it without sharp creases; tight folding can crack waterproof coatings over time.
Store the bag in a cool, dry place away from direct sunlight and extreme heat. Avoid basements that feel damp. Put the bag in a breathable storage sack or cotton sheet rather than an airtight plastic bag to allow any remaining moisture to escape.
Keep straps and small parts together in a labeled pouch. Elevate the bag off concrete floors if possible to reduce damp exposure. Check stored bags every few months for any sign of moisture or pests.
Routine Inspections for Wear
They should inspect the bag every trip and during seasonal storage checks. Look for small tears, seam separation, and frayed webbing first; these issues grow quickly under load.
Run hands along seams and feel for soft spots or thinning fabric that indicates UV or abrasion damage. Check zipper teeth for bends and test buckles for cracking or stiffness. Tug each strap and stitching with moderate force to confirm secure attachment points.
If they find minor tears, patch them with appropriate repair tape or a sewn patch and reapply seam sealer. Replace straps, buckles, or zippers that show more than light wear rather than risking failure on the road.
Legal and Safety Considerations
This section explains what laws to check and how to adjust driving for roof bags. It focuses on load limits, visibility, tie-down rules, and safe speeds to avoid damage or fines.
Complying With Local Regulations
They must check state and local rules before using a roof bag. Many states limit how much a roof load can weigh; common limits range up to about 150 pounds for soft roof bags, but exact numbers vary. Vehicles with factory roof racks often have published roof-load limits in the owner’s manual — follow that number, not guesses.
They should also confirm how far cargo can extend past the rear and whether flags or lights are required. Some states require a red flag or light if items stick out more than a set number of feet. Law enforcement can ticket for insecure loads, so use rated straps and quick-release-free knots, and show documentation if asked.
Inspect mounting points and straps before each trip. Replace frayed straps and fasteners, and make sure the bag does not block mirrors or windows. Keep receipts or specs for the bag and straps to prove rated capacity when needed.
Travel Speed Recommendations
They should reduce highway speed when carrying a loaded roof bag. High speeds increase wind lift and stress on straps and seams, raising the chance of shifting or failure.
A safe rule is to stay below 65 mph on highways and slower in high wind or heavy rain. Drive 10–20 mph slower than normal on steep grades, tight curves, or when passing large trucks.
They must drive smoothly: avoid sudden steering, quick lane changes, and hard braking. Check straps and load position at the first stop and every 100 miles after. If the bag shifts or noise changes, pull over and re-secure the load before continuing.
Upgrading and Customizing Features
This section shows practical upgrades that improve safety and security. It lists materials, placement tips, and installation choices the reader can use right away.
Reflective Elements for Visibility
Add reflective tape or panels to the bag’s outer surface to boost night visibility. Use 1–2 inch wide retroreflective tape in strips across the rear and sides so headlights hit the material at common angles. Place at least three strips: one centered rear, one on each side near the bottom seam.
Choose high-contrast colors like silver or fluorescent yellow against dark fabric. Sew or use industrial adhesive; stitched edges last longer than glued-only fixes. For extra visibility, install small LED strip lights powered by a 12V battery pack in a zippered pocket. Make sure electrical wiring is weatherproof and that lights are removable for charging.
Inspect reflective patches for peeling or dirt before each trip. Replace any worn tape and keep reflective surfaces clean for maximum effectiveness.
Advanced Locking Systems
Install a multi-point locking cable that threads through zippers and anchors to the roof rack. Use a braided steel cable with a weatherproof vinyl coating and a keyed or combination lock rated for outdoor use. Thread the cable through all zipper pulls and loop it around a fixed rack bar, then lock it to prevent quick-zip theft.
Consider adding a tamper-evident seal or thin steel plate behind the zipper area to slow cutting tools. For higher security, fit a compact alarm module that triggers when the lock’s cable is cut or when movement is detected. Choose alarms with adjustable sensitivity and a loud siren (90+ dB).
Keep a spare key or record combination in a secure place. Test the full locking system on the car before a long trip to confirm fit and that the roof bag still sits flat and sealed.
Eco-Friendly Material Choices
Choosing the right material helps reduce waste and keeps roof bags durable for many trips. They should balance strength, weather resistance, and lower environmental impact.
Recycled PET (rPET) fabric uses plastic bottles and cuts new plastic use. It resists tearing and sheds water when coated. It is widely available and works well for the outer shell.
Natural fibers like hemp and organic cotton give a lower-carbon option if cared for properly. They breathe and are easier to repair, but they may need a durable waterproof lining. Hemp is stronger and wears longer than standard cotton.
Look for PFC-free waterproof coatings to avoid persistent chemicals. Alternatives like polyurethane (PU) coatings can provide water resistance with fewer long-term pollutants. Check product labels or supplier specs for clear claims.
Reinforcements matter: use recycled nylon webbing or stainless steel hardware for buckles and loops. These last longer and reduce replacements. Avoid mixed-material parts that cannot be separated for recycling.
Simple comparison table:
| Material | Pros | Cons |
|---|---|---|
| rPET fabric | Durable, uses recycled plastic | Still plastic, needs coating |
| Hemp/Organic cotton | Renewable, repairable | Less naturally waterproof |
| PU coating | Water-resistant, fewer toxins | Can wear over time |
| Stainless hardware | Long-lasting, recyclable | Higher upfront cost |
They should prioritize durability and repairability to lower lifetime impact. Patching and replacing small parts extends use and reduces waste.
FAQs
| Question | Answer |
|---|---|
| What materials are needed? | They need a heavy-duty tarp or marine fabric, weatherproof thread, strong straps with buckles, foam or rubber padding, and basic sewing tools. Use corrosion-resistant hardware. |
| Is it safe to use a homemade roof bag? | It can be safe if built and installed correctly. They must distribute weight evenly, secure all straps, and avoid exceeding the vehicle roof rating. |
| How much weight can a roof bag hold? | Weight limits depend on the car roof and roof rack. Many cars allow 75–165 lbs (34–75 kg). Check the vehicle manual for exact limits. |
| How to make it waterproof? | They should use waterproof fabric, seam tape, and sealed zippers. Adding a tarp layer or spray-on seam sealer improves protection. |
| Do they need roof racks? | Some roof bags work without racks using straps that loop through doors. Racks give better stability and are recommended for heavier loads. |
| How to prevent wind noise and flapping? | They should keep the bag low, pack items tightly, and use extra straps for tension. Padding under straps reduces movement. |
| Any legal or speed limits? | Laws vary by region. Many manufacturers advise lower highway speeds and checking local load laws. Heavier or taller loads may require reduced speed. |
They should inspect straps and seams before each trip. Regular checks during travel reduce risk.
Conclusion
They can make a strong, weatherproof roof bag at home with basic materials and careful sewing. A simple design saves time and reduces failure points.
They should test the bag on short drives first. This checks fit, straps, and seams before a long trip.
They must secure the bag to the vehicle using wide straps and non-slip pads. That lowers movement and protects paint.
They should seal zippers and seams against water; a waterproof liner adds extra protection. Lightweight items go on top; heavy items stay low and centered.
They can maintain the bag by rinsing salt and dirt after trips and repairing small tears quickly. Proper care extends usable life and keeps cargo safe.
Quick checklist:
- Measure roof and cargo before building.
- Use heavy-duty fabric and reinforced stitching.
- Add straps, padding, and a waterproof liner.
- Test fit and strap tension on a short trip.
Following these steps helps create a practical, safe roof bag that meets needs without expensive gear.