You want a suction mount that stays put on a textured dash without risking a falling phone or sticky mess. Use a flat adhesive disc or backing plate and prep the surface so the suction cup has a smooth, nonporous spot to seal to, and you’ll get a reliable hold. This approach avoids relying on the dash texture and works with most suction mounts.
They will learn simple prep steps, which mount types work best, and quick fixes for heat or bumps that loosen the seal. Follow the short steps ahead and you’ll cut down on drops, distractions, and wasted time.
Key Takeaways
- Create a smooth, nonporous patch for the suction cup to stick to.
- Pick a mount with a compatible adhesive backing for textured surfaces.
- Clean and press firmly to maintain a long-lasting hold.
Understanding Suction Mount Compatibility
This section explains which dashboard surfaces work with suction mounts, how suction cups create their seal, and what surface conditions help or hurt adhesion.
Types of Dashboard Textures
Dashboards come in a few common finishes: smooth plastic, fine-grain texture, coarse pebble texture, and soft-touch rubberized coatings.
Smooth plastic and glass give the best seal because they provide a flat, non-porous area for the suction cup to press against.
Fine-grain textures sometimes work if the bumps are very small and the suction cup is large and flexible.
Coarse pebble textures and soft-touch coatings usually fail because the tiny valleys let air leak under the cup.
He should look for a flat, non-textured patch near the windshield or a factory-made smooth insert.
If no smooth spot exists, an adhesive mounting disk or a vent/adhesive mount may suit better than a direct suction cup.
How Suction Cups Work
A suction cup sticks by creating a vacuum between the cup and the surface.
When pressed down, the air inside the cup is expelled and the flexible rim seals against the surface, letting outside air pressure hold the cup in place.
Elastic materials matter. Soft rubber or silicone rims conform to small imperfections and keep the seal longer.
Rigid cups resist deformation and lose their vacuum faster, especially on textured surfaces.
Temperature and age affect the seal too. Heat softens the cup and can weaken the vacuum; cold makes the material brittle.
Dirt, oils, and old material reduce grip. A clean, pliable cup on a non-porous surface gives the most reliable hold.
Evaluating Surface Conditions
Before mounting, inspect the chosen spot for texture, dust, oil, and curvature.
Run a fingertip across the area; if bumps are clearly felt, the cup probably won’t hold. Clean the spot with isopropyl alcohol and let it dry.
Check curvature with the cup: slight curves may be okay if the cup rim flexes to close gaps.
Deep curves, seams, or vents will break the vacuum and should be avoided.
Use simple tests: press the cup firmly and pull gently to feel initial hold, then leave it for 10–15 minutes to see if the seal softens.
If the mount drifts or peels, choose a different spot, use an adhesive disk, or swap to a non-suction mounting method.
Preparing the Installation Area
Clean the exact mounting spot, remove oils and dust, and let the surface dry fully. Use the right cleaner and a flat adhesive disc if the texture prevents a direct suction seal.
Cleaning Techniques for Textured Surfaces
They should remove loose dust and grit first so cleaners work well. Use a soft brush or a microfiber cloth to sweep the area, getting into small crevices without scratching the dash.
Next, apply a cleaning solution to a cloth rather than spraying the dash. Wring the cloth so it’s damp, not wet, and rub in small circular motions to dislodge embedded dirt from the texture. Repeat with a clean cloth until no more grime transfers.
Avoid scrubbing with hard brushes or scouring pads. They can wear the finish and leave particles that interfere with adhesion.
Selecting Safe Cleaners
Choose cleaners that remove oils but won’t damage vinyl, leather, or painted surfaces. Isopropyl alcohol (70%) works well for most dashboards; use it sparingly on colored or treated surfaces. Mild dish soap diluted in water is safe for sensitive materials.
Test any cleaner on a hidden spot first. Apply a small amount, wait 5–10 minutes, and check for discoloration or softening. If the finish changes, stop and try a different product.
Avoid solvents like acetone or paint thinners. They strip coatings and can leave residues that stop adhesives and suction cups from sealing.
Drying the Dashboard Properly
They must ensure the surface is bone dry before mounting. Pat the area with a clean microfiber cloth to remove visible moisture, then leave the car doors open for a few minutes to air out trapped dampness.
For faster drying, use a hair dryer on the low, cool setting held 6–8 inches away. Move it slowly across the area to avoid overheating any one spot.
Only attach the suction mount or adhesive disc once the surface feels cool and completely dry to the touch. Any remaining moisture can break the seal and cause the mount to fail.
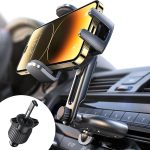
Choosing the Right Suction Mount
Pick a mount that matches the dashboard texture, device weight, and vehicle conditions. Look for designs that add grip or use adhesive pads, check build materials and locking mechanisms, and read real-user feedback about long-term hold.
Features Designed for Textured Dashboards
Mounts made for textured surfaces use two main approaches: a soft gel pad that molds to bumps, or a mechanical clamp with a small adhesive disk. Gel or “nano” pads fill gaps in the texture and improve the vacuum seal. Adhesive disks create a smooth, flat surface for a traditional suction cup to stick to.
Look for a wide suction cup (2.5–3.5 inches) and a lever or twist-lock that removes air reliably. Flexible mounting arms help position the device without stressing the joint. Avoid thin silicone cups and single-piece plastic arms that flex and fail on rough roads.
Assessing Product Quality
Check materials: thicker silicone or TPU cups resist heat and keep pliability in summer. Metal or reinforced polymer joints last longer than cheap plastic. Test the locking mechanism by twisting or pressing it; it should hold with firm resistance and no wobble.
Look for temperature ratings and an IP rating if exposure to sun is common. Consider mounts with replaceable pads or cups so the user can swap worn parts instead of replacing the whole unit. Warranty terms and clear replacement-part availability signal a higher-quality product.
Reviewing User Feedback
Focus on reviews that mention similar dashboards and climates. Users with textured vinyl or pebble-grain dashes give the most relevant reports. Give more weight to long-term reviews (weeks to months) rather than first impressions.
Scan for consistent praise or complaints about slippage, heat-related failures, or rattling on rough roads. Note whether reviewers used an adhesive disk or gel pad and whether that solved their problem. Verified-purchase reviews and photos help confirm claims.
Ensuring Secure Attachment
Use a firm, flat adhesive surface when the dash is textured, apply the suction cup with steady pressure, and test for tiny air leaks. These steps help keep the mount from falling and reduce distraction while driving.
Using Adhesive Pads or Mounting Discs
They should choose a mounting disc sized to the suction cup base, made from nonporous plastic or metal. Clean the dash with isopropyl alcohol first so the adhesive bonds to oil- and dust-free plastic.
Peel the backing and press the disc firmly for 30 seconds. Leave the adhesive to cure per the manufacturer’s time (often 24 hours) before attaching the suction cup.
Select VHB or automotive-grade double-sided tape that resists heat. Avoid thin foam tape; it compresses and can let air in. If the disc leaves residue later, use a plastic-safe adhesive remover.
Pressurizing the Suction Cup Correctly
Center the suction cup on the mounting disc or a smooth dash area. Press the cup flat with steady force from the center outward to push air out and form a vacuum.
If the mount has a lever or twist-lock, engage it while holding pressure. Hold for 10–20 seconds to improve the seal, then test by lightly tugging the mount.
Warm the suction cup slightly with hands or a hair dryer on low for a few seconds in cold weather to make the rubber pliable. Do not overheat; high heat can warp the cup or damage the dash.
Checking for Air Leaks
Run a fingertip around the cup edge to feel for drafts. Any cool or moving air suggests a gap that will let the mount fail.
Apply a thin bead of petroleum jelly or silicone grease around the rim for a small temporary seal if leaks persist. Wipe away excess; do not smear onto the dash.
Recheck after 10 minutes and again after a short drive. If the cup shifts or loses suction, remove it, clean both surfaces, and repeat the attachment steps or switch to a new disc or adhesive.
Common Mistakes and Troubleshooting Tips
Focus on cleaning, choosing a flat spot, and using a pad or adhesive when needed. Small changes in placement and prep solve most problems quickly.
Preventing Suction Failure
They must clean both the dashboard and the suction cup before mounting. Use isopropyl alcohol or mild soap and water, then let surfaces dry fully. Dust, oils, and film break the seal and cause early failure.
If the dashboard is textured, they should use a silicone mounting pad or adhesive disc. Press the pad firmly for 30 seconds and wait 24 hours before attaching the suction cup. This creates a smooth, non-porous surface that holds vacuum.
They should also check the suction cup for nicks, hardening, or loose parts. Replace any cup that shows wear. Rubber cups regain grip if warmed slightly in warm (not hot) water before mounting.
Adjusting Placement for Stability
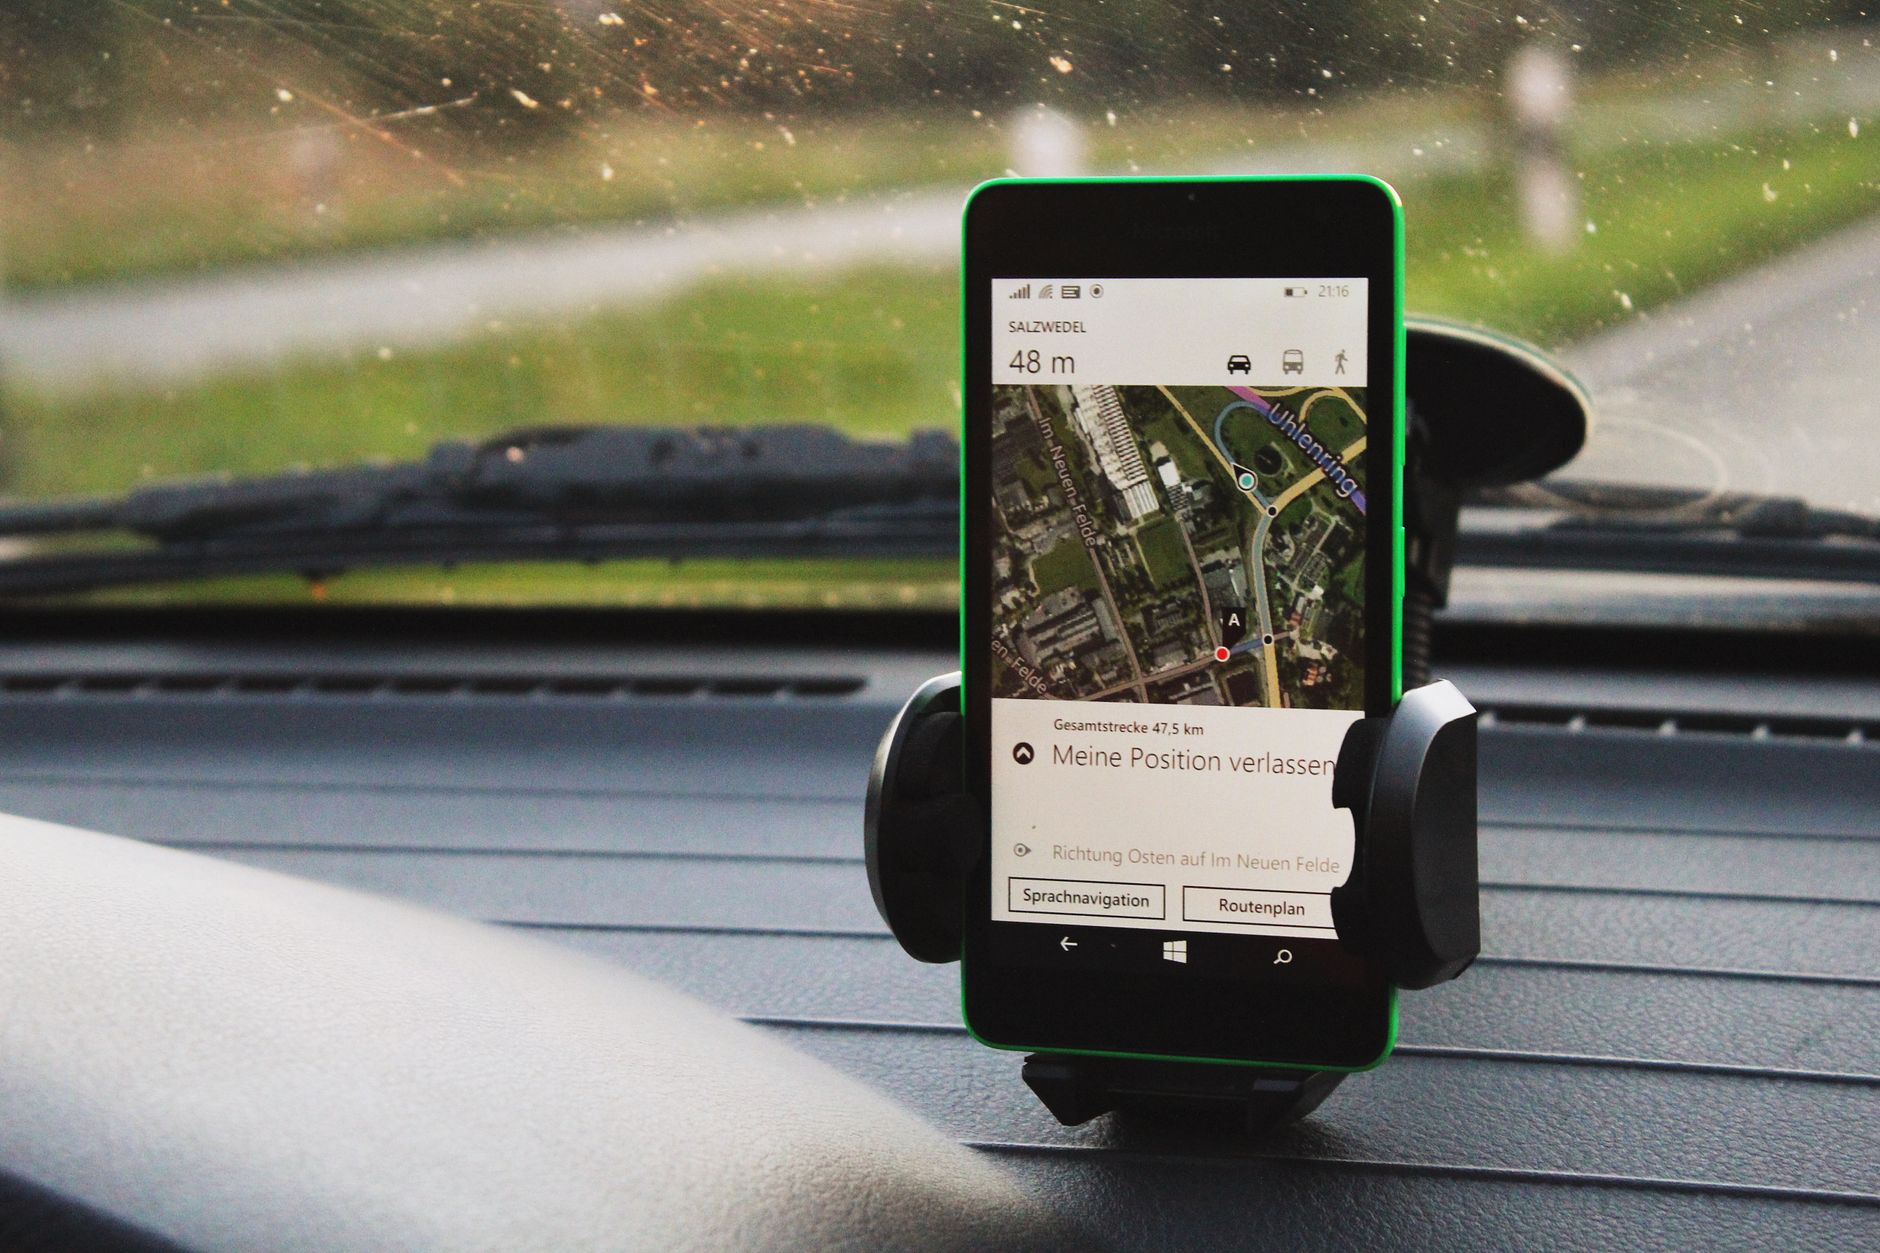
They should pick a flat, level area near the windshield or center dash, avoiding curved edges and vents. Curves and vents let air leak under the cup and tilt the mount under weight.
They should attach the mount with the arm folded or loosened, then tighten while holding the device in place. This prevents torque that can yank the cup loose when the car moves.
If vibration or weight still causes slipping, they should move the mount closer to the car’s centerline or use a shorter arm. Heavier devices need shorter or reinforced mounts, and lighter devices work on longer arms.
Long-Term Maintenance and Safety
Keep the mount clean, check the seal often, and protect the dash surface. Small checks and simple fixes will prevent falls, damage, and sticky residue over time.
Periodic Reattachment Procedures
They should remove the mount every 1–2 weeks for textured dashboards and inspect the cup and surface. Clean the cup rim with warm soapy water and a soft cloth, rinse, and air dry. Worn seals or hard debris reduce suction, so replace the cup or seal if cracks or permanent deformations appear.
When reattaching, press the cup firmly and hold for 10–20 seconds to expel air. If the mount uses a locking lever, engage it while keeping pressure. Test the bond by tugging gently and by placing the device on the mount before driving.
Keep a small kit in the car: microfiber cloth, rubbing alcohol wipes, and a spare adhesive pad or suction cup. These tools let them fix common problems quickly and safely.
Avoiding Dashboard Damage
They must avoid harsh solvents and metal tools on the dash. Rubbing alcohol in small amounts is fine for cleaning, but strong adhesives, acetone, or scrapers can discolor or melt textured plastic.
If using an adhesive dashboard disk, choose a reusable gel pad rated for heat and remove it monthly to check for residue. To remove residue, warm the area with a hair dryer on low, soften the adhesive, and peel slowly at a low angle. Clean remaining residue with a mild detergent and a soft cloth.
Use protective backing like a thin foam pad between the mount base and the dash for long-term use. This spreads pressure and reduces contact wear without blocking the suction when the disk or cup is positioned correctly.
Weather-Related Considerations
Heat softens adhesives and lowers suction strength. In summer, park in shade or use a sunshade to limit dash temperatures above 140°F (60°C). If the mount slips in heat, relocate it to a less exposed spot or switch to a high-temperature rated adhesive pad.
Cold makes plastics stiff and seals brittle. In winter, warm the suction cup with hands or warm water before attaching to improve flexibility and seal formation. Avoid sudden temperature shocks, like pouring hot water on a frozen cup, which can crack rubber.
Humidity can attract dust and reduce grip over time. Wipe the mount and dash with a dry microfiber cloth weekly in humid climates and replace gel pads seasonally if they lose tack.
Alternative Mounting Solutions
When suction cups fail on textured dashboards, they can choose other mounts that work better. Adhesive dash disks provide a smooth surface for suction cups and stick to textured material. They hold well in heat if the adhesive is rated for automotive use.
Magnetic mounts offer fast placement and removal. They require a thin metal plate on the device or case. Users should pick strong magnets and check that the phone’s functions are not affected.
Vent mounts clip into air vents for a simple install. They avoid the dash entirely but may block airflow and can shift on weak vents. Choose models with broad grips and rubberized jaws to reduce slippage.
Sticky adhesive mounts attach directly to the dash without a disk. They use automotive-grade glue or gel pads. These can be permanent and may leave residue, so users should test in a hidden spot first.
Center console or cup-holder mounts insert into a cup holder or clamp to the console. They give great stability and keep the windshield clear. They work for larger devices but take up cup space.
Quick comparison (short):
- Adhesive dash disk: smooth surface, semi-permanent.
- Magnetic mount: fast, needs metal plate.
- Vent mount: easy install, may block vents.
- Adhesive mount: strong hold, possible residue.
- Cup-holder mount: very stable, uses cup space.
They should choose the option that balances grip, visibility, and how permanent the mount will be.
FAQs
What causes a suction cup to fail on a textured dash?
Tiny bumps let air leak under the cup, so the seal breaks. Heat and dust make the problem worse by softening materials and reducing grip.
Can a suction mount work on a textured surface?
Yes, with the right prep and tools. Using a smooth adhesive disc or a thin rigid mounting plate creates a flat area for the suction cup to seal.
How long will an adhesive disc last?
It depends on temperature and cleaning. In moderate conditions, many discs hold for months. High heat or oily surfaces shorten the life, so check it often.
Will adhesive leave residue or damage the dash?
Some adhesives can leave light residue if removed later. Choosing a high-quality removable adhesive disc and following removal steps reduces residue and risk.
Is a vent or CD-slot mount safer than a suction mount?
It depends on the vehicle and device weight. Vent mounts avoid dashboard issues but may block airflow. CD-slot mounts fit some cars but can loosen with vibration.
How should one clean the area before mounting?
Wipe with isopropyl alcohol and a lint-free cloth until dry. Removing dust and oils helps the adhesive and suction bond better.
What about extreme temperatures?
Extreme heat softens both suction and adhesive, increasing failure risk. In cold, materials become brittle and may lose flexibility. They should inspect mounts before driving.
Conclusion
They should choose the mounting method that matches the dashboard and their needs. Suction cups work on smooth, flat areas but fail on textured or curved surfaces. Adhesive pads or a dash disk often provide a safer, more reliable hold.
They must prepare the surface before attaching anything. Clean the area, remove oils, and let it dry fully. A small test hold checks fit and placement before driving.
They should use heat-resistant adhesive if the car sits in hot climates. Some adhesives leave residue, so they must weigh permanence against convenience. Removable pads offer an easier swap with less clean-up.
They must check the mount regularly for signs of lifting or wear. Re-seat or replace mounting parts when needed. A loose mount can become a driving hazard.
They should follow manufacturer weight limits and placement rules. Position mounts where they do not block airbags, vents, or the driver’s view. Correct placement keeps the device accessible and the cabin safe.